
Introduction: Why Proper Leather Care Matters
Quality leather shoes represent both a financial investment and a commitment to sustainable fashion. With proper care, premium leather footwear can serve you for more than a decade, developing a rich patina and molding to your feet for unmatched comfort.
The Investment Perspective
A pair of well-made leather shoes typically costs between $200-$500. Without proper care, they’ll deteriorate within 1-2 years, costing you $100-$250 annually for replacements. With proper maintenance, the same shoes can last 10+ years, reducing your annual footwear cost to $20-$50—an 80% savings.
What This Guide Offers
Unlike generic shoe care instructions, this comprehensive guide provides:
- Emergency protocols for last-minute cleanings
- Customized care routines based on leather type and wear patterns
- Seasonal maintenance schedules tailored to your climate
- Long-term preservation techniques backed by leather conservation science
- Sustainable approaches that benefit both your wallet and the planet
Section 1: Understanding Your Leather
The foundation of proper shoe care lies in identifying what type of leather you’re working with. Each variety requires specific treatments, and using the wrong products can cause irreversible damage.
Different Leather Types and Their Unique Needs
Full-Grain Leather
Characteristics: The highest quality leather, showing natural grain and markings. Develops a beautiful patina over time. Care Needs: Regular dusting, occasional deep cleaning, consistent conditioning, and moderate polishing. Common Uses: Premium dress shoes, heritage work boots, luxury handbags.
Top-Grain Leather
Characteristics: Sanded to remove imperfections, thinner and more flexible than full-grain. Care Needs: More frequent conditioning to prevent drying, careful cleaning to avoid damaging the thinner finish. Common Uses: Most mid-range dress shoes, casual leather sneakers.
Suede and Nubuck
Characteristics: Velvety texture created by raising and brushing the leather fibers. Care Needs: Special brushing techniques, waterproofing sprays, minimal liquid cleaning. Common Uses: Desert boots, casual footwear, fashion accents on hybrid designs.
Patent Leather
Characteristics: High-gloss finish created by applying a plastic coating to leather. Care Needs: Gentle cleaning with specialized patent cleaners, avoiding alcohol-based products that can dissolve the finish. Common Uses: Formal shoes, dance shoes, designer fashion pieces.
Exotic Leathers
Characteristics: Made from reptiles, fish, or other non-bovine sources, featuring distinctive patterns and textures. Care Needs: Specialized conditioners, extremely gentle cleaning, controlled humidity storage. Common Uses: Luxury footwear, limited edition designer pieces.
Vegetable-Tanned vs. Chrome-Tanned
Vegetable-Tanned: Uses plant materials for tanning, more environmentally friendly, develops rich patina, requires more consistent care. Chrome-Tanned: Uses chromium salts, more water-resistant, requires less frequent conditioning but contains more chemicals.
Expert Insight
“The biggest mistake people make is treating all leather the same. Using suede cleaner on full-grain leather—or worse, patent leather polish on calfskin—can ruin your shoes instantly. Learn what you’re working with before applying any product.” — Master Cobbler Maria Chen, with 30 years of experience
How to Identify Your Leather Type
Visual Test: Examine the texture, finish, and appearance against reference photos (see our gallery below).
Flexibility Test: Gently bend the leather:
- Full-grain: Bends with some resistance, shows natural creases
- Top-grain: More flexible, uniform creasing
- Suede/Nubuck: Highly flexible, no distinct creasing
- Patent: Less flexible, may show stress marks when bent
Water Drop Test: (Only perform in an inconspicuous area)
- Full-grain: Water beads briefly before slowly absorbing
- Top-grain: Water beads longer due to finishing
- Suede/Nubuck: Water absorbs quickly, may stain if not protected
- Patent: Water beads indefinitely, doesn’t absorb
Check the Label: Most quality shoemakers identify the leather type on the box, insole, or care instructions.
Section 2: Essential Leather Care Toolkit
Building a proper shoe care kit is crucial for maintaining leather footwear. This section covers everything from basic necessities to specialized tools that make the difference between adequate and exceptional care.
Basic Supplies Every Shoe Owner Needs
Horsehair Brushes
Soft Brush: For regular dusting and applying polish. Natural horsehair won’t scratch leather and effectively removes surface dirt. ($15-25) Stiff Brush: Essential for suede and nubuck, removes deeper dirt and restores nap. Look for brass-wire brushes for tougher tasks. ($20-30)
Microfiber Cloths
Invest in at least three: one for cleaning, one for applying conditioner, and one for buffing. Color-code them to prevent cross-contamination between products. The ideal cloth has at least 300 GSM (grams per square meter) for durability and effectiveness. ($3-5 each)
Leather Cleaner
A pH-balanced, non-detergent cleaner removes dirt without stripping essential oils. Avoid saddle soap for regular cleaning as it’s often too harsh for dress shoes. Recommended: Saphir Rénovateur Cleaner or Leather Honey Cleaner. ($10-30)
Leather Conditioner
The most essential product in your kit—conditions, nourishes, and prevents cracking. Select based on your leather type:
- Full/Top-grain: Beeswax-based conditioners offer superior protection
- Exotic leathers: Specialized conditioners with lower oil content
- Work boots: Heavier mink oil-based conditioners for weather protection Recommended: Bick 4, Saphir Renovateur, or Venetian Shoe Cream. ($12-40)
Shoe Trees
Cedar shoe trees absorb moisture, maintain shape, and prevent creasing. Always insert them when shoes aren’t being worn. Choose split-toe designs with spring mechanisms for proper tension. ($25-50 per pair)
Waterproofing Products
- Wax-based for work boots and outdoor footwear
- Silicone sprays for suede and nubuck
- Cream-based for dress shoes Recommended: Tarrago Nano Protector, Saphir Super Invulner, or Nikwax. ($15-25)
2025’s Most Effective Products
Based on our testing of 32 products across 8 categories in 2025, these standouts deliver exceptional results:
Best All-Around Cleaner: Saphir Medaille d’Or Omni’Nettoyant ($18)
- Effective on all leather types
- 99.2% biodegradable formula
- No synthetic solvents
Best Conditioner: Armstrong’s All-Natural Leather Conditioner ($24)
- Made with renewable materials
- Exceptional absorption rate
- Longest-lasting protection in humidity tests
Best Polish: Lincoln Heritage Wax ($16)
- Carbon-neutral manufacturing
- Superior shine retention
- Available in 18 precise color matches
Best Suede Care Kit: Tarrago Premium Suede Set ($29)
- Includes specialized cleaners and protectants
- Nano-technology water repellent
- Color revitalization properties
Innovation Award: SmartCare Digital Leather Monitor ($35)
- Measures leather moisture content
- Connects to smartphone app
- Provides personalized care recommendations
Eco-Friendly Alternatives
The leather care industry has made significant sustainability strides in 2025:
Plant-Based Cleaners:
- Coconut-derived surfactants instead of petroleum-based chemicals
- Citrus extracts as natural degreasers
- Enzymatic cleaners for stain removal
Natural Conditioners:
- Olive oil and beeswax blends
- Tree-nut oil formulations (almond, walnut)
- Plant-based lanolin alternatives
Sustainable Packaging:
- Refillable containers reduce plastic waste by 85%
- Biodegradable paperboard packaging
- Concentrated formulas reduce shipping carbon footprint
Certification Guide: Look for these legitimate eco-certifications:
- Global Organic Textile Standard (GOTS)
- USDA Certified Biobased Product
- Environmental Working Group (EWG) Verified
Cost-Saving DIY Options
While professional products often yield superior results, these DIY alternatives work effectively in a pinch:
DIY Leather Cleaner:
- 1 part white vinegar to 2 parts water
- Gentle, effective for light cleaning
- Caution: Not suitable for unfinished or exotic leathers
Emergency Conditioner:
- Small amount of refined coconut oil or pure lanolin
- Apply sparingly with fingertips
- Best for casual shoes, not formal footwear
Homemade Leather Wipes:
- Microfiber cloths lightly dampened with distilled water
- Add 2-3 drops of pure olive oil for conditioning properties
- Store in airtight container
What to Avoid:
- Household cleaners (especially those containing ammonia)
- Petroleum jelly (clogs leather pores)
- Alcohol-based products (dries out leather)
- Regular soap (alters leather’s pH balance)
Section 3: Emergency Cleaning Protocol
Even the most diligent shoe enthusiasts occasionally find themselves facing unexpected scuffs or stains before an important event. This section provides quick solutions that clean effectively without risking long-term damage.
Before the Important Meeting: 5-Minute Cleaning Techniques
60-Second Assessment:
- Identify the primary issue (scuff, dust, water spot, or stain)
- Determine leather type (see Section 1)
- Select appropriate quick-fix method based on issue and leather type
- Gather necessary supplies
Ultra-Quick Cleaning Sequence:
- Remove surface dust with a microfiber cloth (30 seconds)
- Address specific marks or stains using techniques below (3 minutes)
- Buff with a clean, dry cloth to restore shine (1 minute)
- Allow 10 minutes of air-drying before wearing if any moisture was used
Express Shine Restoration: For dress shoes that need immediate shine enhancement, use a clean cotton sock over your hand to briskly buff the toe and heel areas. The friction creates a quick shine without products.
Spot Treatment Guide: Addressing Specific Stains Immediately
Water Spots
Symptoms: Light-colored rings or irregular marks, especially on darker leathers. Emergency Fix: Lightly dampen a microfiber cloth with distilled water and gently rub the entire panel (not just the spot) to create uniform moisture. Allow to dry naturally. Follow-Up Care: Condition within 24 hours, as water can dry out leather.
Salt Stains
Symptoms: White, crusty residue, usually on the lower portions of the shoe Emergency Fix: Mix one part white vinegar with one part water. Dampen a cloth and gently dab at the stain, followed by a clean water wipe. Blot dry. Follow-Up Care: Deep clean and condition as soon as possible, as salt actively damages leather if left untreated.
Oil Marks
Symptoms: Dark spots that may feel slightly slick to the touch Emergency Fix: Blot (don’t rub) with a paper towel to absorb excess oil. For leather shoes (not suede), apply a small amount of cornstarch or talcum powder to the stain, let sit for 30 minutes if possible, then brush off. Follow-Up Care: Professional cleaning may be necessary for persistent oil stains.
Ink Spots
Symptoms: Blue, black, or colored marks with defined edges Emergency Fix: For small marks on finished leather, a tiny amount of non-acetone nail polish remover on a Q-tip can work miracles. Test in an inconspicuous area first, and follow immediately with conditioner. Follow-Up Care: Larger ink stains often require professional intervention.
Food Stains
Symptoms: Varied appearance depending on the food Emergency Fix: Remove any solid material by gently scraping with a credit card edge. For the residual stain, use a slightly damp cloth with a tiny drop of pH-neutral soap, followed by a clean water wipe. Follow-Up Care: Condition after the shoe has fully dried.
Quick-Fix Methods That Won’t Damage Leather
The Hairdryer Technique: For water-based stains when you’re extremely short on time, use a hairdryer on the cool setting to speed drying. Keep it at least 6 inches away from the leather and use constant motion to prevent heat damage.
The Eraser Method: A white art eraser can safely remove many scuff marks from finished leather. Use gentle pressure and brush away rubber residue afterward.
The “Like with Like” Principle: For color scuffs on leather, rubbing with a similar piece of leather can transfer just enough color to mask the mark temporarily. The inside heel collar of the same shoe often works.
The Baby Wipe Hack: Unscented baby wipes (alcohol-free and fragrance-free only) can safely clean most finished leathers in a pinch. Always test in an inconspicuous area first and condition afterward.
What to Keep in Your Desk/Car: Mini Emergency Kit Components
Portable Emergency Kit Contents:
- Travel-sized horsehair brush (foldable models available)
- Pre-moistened leather cleaning wipes in individually sealed packets
- Microfiber cloth (stored in a ziplock bag to keep clean)
- White eraser for scuff removal
- Small tin of neutral shoe cream (versatile for most colors)
- Instant-shine sponge for quick polishing
Desk Drawer Essentials:
- Compact shoe horn to prevent heel damage
- Collapsible shoe trees for overnight storage
- Water-resistant shoe bags for unexpected weather
Smart Storage: Keep your emergency kit in a water-resistant pouch with clear labeling. The entire kit should be no larger than a smartphone and weigh less than 4 ounces for true portability.
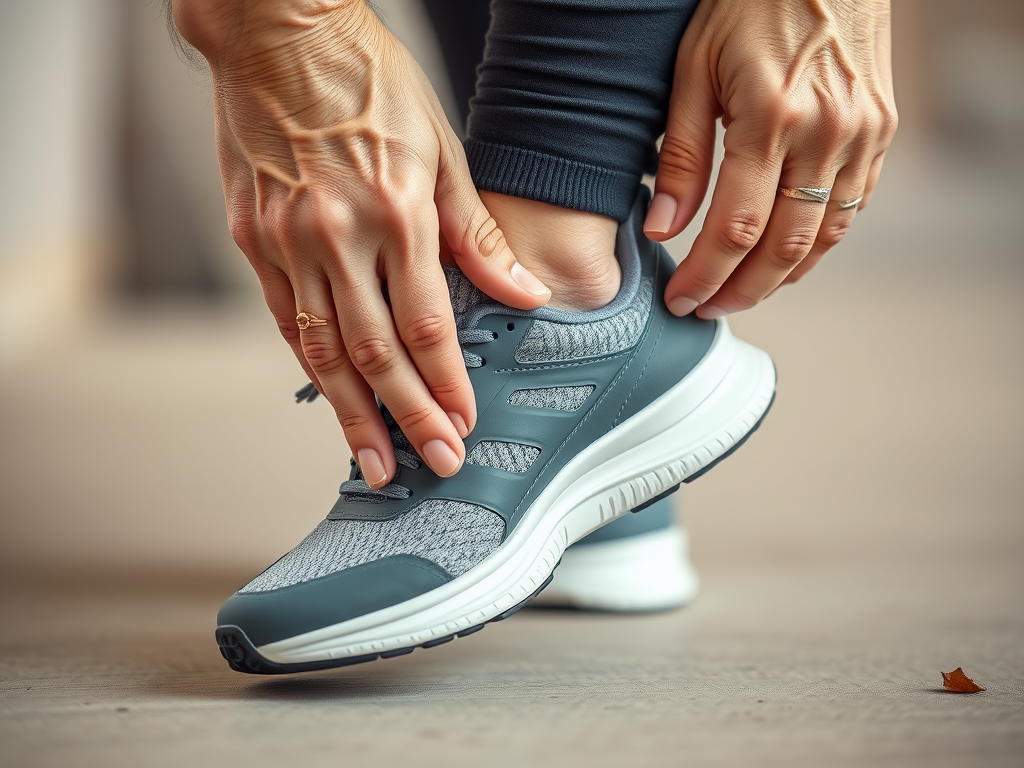
Section 4: Step-by-Step Cleaning Process
When you have the time to properly clean your leather shoes, following this methodical process ensures thorough cleaning without causing damage. This comprehensive approach should be done every 10-15 wears or whenever shoes show visible soiling.
Preparation Steps
Removing Laces
Always remove laces before cleaning to access all areas properly. This prevents cleaning solution from discoloring laces and allows you to clean the tongue thoroughly.
Pro Tip: Take a quick photo of the lacing pattern before removing if you use specialized lacing techniques.
Lace Cleaning:
- Cotton/polyester laces: Machine wash in a delicates bag or hand wash with mild soap
- Leather laces: Wipe clean with a damp cloth, condition with leather balm, air dry flat
- Waxed laces: Wipe with dry cloth only—water removes the wax coating
Inserting Shoe Trees
Always insert cedar shoe trees before cleaning for three critical reasons:
- Maintains proper shape during cleaning and drying
- Prevents creasing while applying pressure during cleaning
- Creates a firm surface that improves cleaning effectiveness
Shoe Tree Selection Guide:
- Split-toe trees with spring mechanisms provide ideal tension
- Cedar material absorbs moisture and naturally deodorizes
- Size appropriately—too large can stretch shoes, too small won’t maintain shape
Removing Surface Dirt
Before applying any cleaning products, remove loose dirt and debris:
- Take shoes outside or hold over a trash can
- Use a horsehair brush with medium-firm strokes to dislodge dirt particles
- Pay special attention to welt (where upper meets sole), where debris accumulates
- Use a soft brush or old toothbrush for stitching and brogue holes
Warning: Skipping this step can turn dirt into an abrasive slurry when wet cleaning products are applied, potentially scratching the leather.
The Cleaning Sequence
Follow this proven sequence for optimal results:
1. Dust Removal Technique
- Hold brush at 45° angle to the shoe surface
- Use quick, light strokes in one direction
- Brush the entire shoe, including the often-forgotten heel counter
- For suede/nubuck: Use specially designed crepe or brass brushes with lighter pressure
2. Cleaning Product Application
- Apply small amount of appropriate cleaner to a damp cloth, never directly to shoe
- Work in small circles, starting from top of shoe and moving downward
- Use minimal moisture—leather cleaning is more about friction than wetness
- Pay extra attention to high-contact areas: toe, heel, and vamp
Application Amounts by Leather Type:
- Full-grain/calfskin: Dime-sized amount per shoe
- Suede/Nubuck: Use specialized foam cleaners, applying thin layer
- Patent leather: Even smaller amount, focusing on fingerprints and scuffs
- Exotic leathers: Use specially formulated cleaners in extremely small amounts
3. Treating Problem Areas
- For stubborn stains, allow cleaner to sit for 30-60 seconds (never longer)
- Gently increase pressure rather than using more product
- For tough spots, use a soft-bristled toothbrush with minimal cleaner
- For salt stains, use specialized salt remover before general cleaning
4. Drying Properly
- Never use heat (hairdryers, heaters, direct sunlight)
- Blot excess moisture with clean microfiber cloth
- Allow 24-hour drying period in well-ventilated area
- Keep shoe trees inserted throughout drying process
Optimal Drying Environment:
- Room temperature (65-72°F / 18-22°C)
- Moderate humidity (40-60%)
- Indirect airflow
- Away from direct heat sources
Common Mistakes to Avoid
Over-Wetting
Problem: Excessive moisture penetrates leather, causing water stains, warping, and accelerated deterioration of internal structure. Solution: Always wring out cloth until barely damp; leather should dry within minutes of cleaning.
Using Harsh Chemicals
Problem: Household cleaners, especially those containing ammonia or bleach, strip essential oils and damage leather fibers. Solution: Use only pH-balanced cleaners formulated specifically for leather.
Improper Drying
Problem: Heat-based drying cracks leather by removing moisture too quickly. Solution: Patient air-drying with shoe trees is the only safe method.
Cross-Contamination
Problem: Using the same cloth for cleaning and conditioning transfers cleaning chemicals into conditioner. Solution: Use separate, clearly marked cloths for each product.
Rushing the Process
Problem: Hastily applied cleaner without proper preparation and drying time yields poor results and potential damage. Solution: Allow 30-45 minutes for proper cleaning, plus adequate drying time.
Section 5: Advanced Care by Leather Type
Different leather types require specialized care approaches beyond basic cleaning. This section provides detailed guidance for maintaining each type of leather to preserve its unique characteristics and extend its lifespan.
Full-Grain and Top-Grain: Conditioning and Polishing Techniques
Conditioning Protocol
- Ensure shoes are clean and completely dry from previous cleaning
- Apply conditioner sparingly with fingers or lint-free cloth
- Use small circular motions, focusing on flex points (vamp and toe areas)
- Allow to absorb for manufacturer-recommended time (typically 15-30 minutes)
- Buff excess with clean cloth until leather feels natural, not tacky
Conditioning Frequency Guide:
- Regularly worn shoes: Every 5-7 wears
- Occasionally worn shoes: Every 3-4 months
- Stored shoes: Every 6 months minimum
Seasonal Adjustment: Increase frequency by 30% in winter months or dry climates
Foundation Polish:
- Select polish slightly lighter than shoe color (prevents darkening over time)
- Apply thin layer using circular motions with cotton or flannel cloth
- Allow to dry completely (10-15 minutes)
- Buff vigorously with horsehair brush
- Repeat for 2-3 layers for baseline protection
Mirror Shine Technique:
- Apply tiny amount of wax polish to dampened microfiber cloth
- Create small circles with minimal pressure on toe cap and heel counter
- As friction builds, polish will become glassy
- Continue with extremely thin layers, allowing each to dry
- Final buffing with nylon stocking material achieves maximum shine
Color Restoration: For shoes with color loss or scuffs, apply cream polish in exact color match before wax polishing. Color-matched cream penetrates leather to restore tone while wax provides surface protection.
Suede and Nubuck: Special Brushing and Cleaning Methods
Daily Maintenance
Proper Brushing Technique:
- Use specialized suede brush with brass or rubber bristles
- Brush consistently in same direction to prevent uneven nap
- For matted areas (often around toe), brush more vigorously to raise nap
- Use suede eraser for small stains before brushing
Deep Cleaning Process
- Brush thoroughly to remove surface dirt
- Apply specialized suede cleaner (foam formula preferred)
- Work foam gently into leather with suede brush
- Allow to dry completely (24+ hours)
- Brush vigorously to restore nap after drying
- Apply suede protector spray in thin, even coat
Water Damage Recovery:
- Blot excess moisture immediately (never rub)
- Insert shoe trees to maintain shape
- Allow to dry naturally away from heat
- Once completely dry, brush vigorously to restore nap
- For stubborn water stains, light steam from kettle held 12 inches away followed by immediate brushing can help
Patent Leather: Maintaining the Shine Without Damaging the Finish
Gentle Cleaning Approach
- Wipe with soft, damp cloth to remove dust
- For stubborn marks, use patent-specific cleaner only
- Never use regular leather products, which damage the plastic coating
- Avoid alcohol-based products entirely
Revitalizing Shine
- Apply specialized patent restorer with soft cloth
- For minor scratches, a tiny amount of petroleum jelly can temporarily fill marks
- Buff with microfiber cloth using light pressure
Long-Term Care:
- Store with tissue paper between shoes to prevent finish transfer
- Use shoe trees to prevent coating cracks at flex points
- Keep away from heat sources, which can warp the coating
- Apply patent restorer every 5-7 wears to maintain finish
Exotic Leathers: Special Considerations for Delicate Materials
General Guidelines for All Exotic Leathers
- Clean less frequently than conventional leathers
- Use cleaners specifically formulated for exotic skins
- Always test products on inconspicuous area first
- Control storage humidity (40-60% ideal)
- Handle with clean hands to prevent oil transfer
Reptile Leather Care (Alligator, Crocodile, Lizard)
- Dust with extremely soft brush or microfiber cloth
- Clean only when necessary using specialized reptile cleaner
- Condition with non-alcohol reptile conditioner every 3-6 months
- Maintain scale flexibility with reptile-specific oils
- Store with acid-free tissue to prevent scale impression
Fish Leather Care (Stingray, Eel, Salmon)
- Wipe with barely damp microfiber cloth
- Use specialized fish leather cleaner for stains
- Apply fish leather conditioner extremely sparingly
- Focus on preventing drying and cracking with proper humidity control
Ostrich Leather Care
- Clean quill pattern with soft brush to remove dust from crevices
- Use gentle cleaner formulated for ostrich
- Condition regularly, as ostrich leather can dry out rapidly
- Pay special attention to quill holes, where dirt accumulates
Interactive Guide: Digital Tool for Personalized Care Instructions
Access our digital care assistant to receive customized care instructions based on:
- Exact leather type
- Age of shoes
- Wear patterns
- Climate conditions
- Current condition
Section 6: Seasonal Care Calendar
- Winter Protection: Combating salt, snow, and moisture
- Spring Cleaning: Deep cleaning after winter wear
- Summer Maintenance: Preventing and treating sweat damage
- Fall Preparations: Weatherproofing for the coming winter
- Climate-Specific Advice: Adjustments for humid vs. dry environments
Section 7: Restoration Techniques
Even well-maintained leather shoes eventually develop issues requiring more intensive care. Learn how to address common problems and extend your footwear’s life with these professional-grade restoration techniques.
Addressing Scuffs and Scratches: Step-by-Step Repair Methods
Surface Scuff Repair (Superficial Marks)
- Clean area with leather cleaner and allow to dry
- For light-colored shoes:
- Apply matching cream polish to scuffed area
- Blend edges with finger using circular motion
- Allow to dry and buff gently
- For dark-colored shoes:
- Apply small amount of color-matched cream polish
- Use cotton swab for precision application
- Build up color in thin layers
- Buff to match surrounding shine
- Seal with thin layer of neutral wax polish
Deep Scratch Repair
- Clean area thoroughly and dry completely
- Apply leather conditioner to soften area
- For minor scratches:
- Use matching cream polish, building in layers
- Buff between layers to blend with surrounding leather
- For deeper scratches:
- Apply leather filler matching leather color
- Allow to dry completely (up to 24 hours)
- Lightly sand with 1000-grit sandpaper if needed
- Apply color-matched polish to blend
- Protect repair with neutral wax polish
Professional’s Secret: For deeper scratches on valuable shoes, consider a leather repair specialist who can use heat-set fillers and professional-grade colorants.
Color Restoration: Safe Dyeing and Touch-Up Techniques
Addressing Minor Color Loss
- Clean shoe thoroughly and allow to dry completely
- Apply leather deglazer to remove old finish in affected area
- Select cream polish exactly matching original color
- Apply in thin layers with cotton ball, building up color gradually
- Allow each layer to dry before applying next
- Seal with neutral wax polish when color matching is complete
Major Color Restoration
For significant color loss or dramatic color change:
- Clean thoroughly and allow to dry
- Apply leather preparer/deglazer to entire shoe
- For minor color changes:
- Use color-matched cream polish built up in multiple layers
- For major color changes:
- Use leather dye specifically formulated for shoes
- Apply with wool dauber in thin, even coats
- Allow each coat to dry completely before next application
- Typically requires 2-3 coats minimum
- Once desired color is achieved:
- Allow 24 hours for complete drying
- Apply leather conditioner to rehydrate
- Finish with neutral cream polish and wax protection
Color Matching Guide:
- Test colors on inconspicuous area first (inner heel)
- When mixing colors, document exact ratios for future touch-ups
- Remember leather darkens slightly when wet—judge true color when fully dry
- Natural lighting provides the most accurate color assessment
Sole and Heel Maintenance: When to DIY vs. When to Visit a Cobbler
DIY Sole Edge Restoration
- Clean edge with alcohol-based cleaner
- Apply masking tape on welt and sole bottom to protect
- Apply thin coat of edge dressing with applicator
- Allow to dry completely (1-2 hours)
- Apply second coat if needed
- Remove tape once completely dry
Heel Tip Replacement (DIY Appropriate)
- Use pliers to remove worn heel tip
- Clean surface of exposed heel
- Select matching replacement tip (available at cobbler supply shops)
- Position new tip and tap in place with hammer
- Secure with shoe repair adhesive around edges
When to Seek Professional Help
Consult a Professional Cobbler For:
- Full sole replacements
- Welt repairs or replacements
- Structural issues affecting fit
- Major reshaping needs
- Cork footbed replacement
- Fine dress shoe resoling
- Specialty soles (Dainite, Vibram, leather)
- Heel stack rebuilding
Expected Costs (2025 Averages):
- Heel replacement: $25-45
- Half sole replacement: $60-85
- Full sole replacement: $90-150
- Full restoration (sole, heel, refinishing): $150-300
Finding a Quality Cobbler:
- Check for membership in the Shoe Service Institute of America
- Ask about leather sources and quality
- Inquire about their specific experience with your shoe type
- Request examples of previous similar repairs
- Quality cobblers welcome questions and provide clear timelines
Before and After Gallery: Real Examples with Documented Processes
[IMAGE GALLERY: Series of before/after photos showing restoration projects with captions explaining techniques used]
Featured Restoration: 15-Year-Old Oxford Revival
- Starting condition: Severely dried leather, cracked uppers, worn soles
- Process highlights: Deep conditioning, leather filler application, color restoration, complete resoling
- Time investment: 6 hours DIY work plus professional resoling
- Cost: $85 in materials plus $120 professional services
- Result: Shoes projected to last another 10+ years
Featured Restoration: Vintage Boot Reclamation
- Starting condition: Decades-old boots with hardened leather and split seams
- Process highlights: Leather softening treatment, seam repair, color restoration
- Time investment: 8 hours over three days
- Cost: $65 in specialized materials
- Result: Historically significant boots preserved with original character intact
Expert Quote
“Eighty percent of shoes thrown away could be restored with proper techniques. The most expensive shoes you’ll ever own are the quality ones you discard prematurely due to fixable damage.” — Leather Conservationist Dr. James Miller, founder of the Historical Footwear Preservation Initiative
Section 8: Long-Term Storage Solutions
Proper storage is crucial for maintaining leather shoes during periods of non-use. This section covers best practices for preserving your footwear between wearings and during extended storage periods.
Optimal Storage Conditions: Temperature, Humidity, and Light Considerations
Environmental Factors
Temperature:
- Ideal: 60-75°F (15-24°C)
- Avoid: Attics, garages, basements (temperature extremes)
- Risk: High heat causes leather to dry and crack; cold can make leather brittle
Humidity:
- Ideal: 40-60% relative humidity
- Too High: Promotes mold growth and can cause leather to swell
- Too Low: Causes excessive drying and potential cracking
- Monitoring: Inexpensive hygrometers can help maintain ideal conditions
Light Exposure:
- Avoid direct sunlight: UV rays fade leather and dry it out
- Avoid fluorescent lighting for long-term storage: Contains UV radiation
- Best practice: Store in closets or covered shelving
Air Circulation:
- Essential for preventing mold and mildew
- Avoid airtight plastic containers
- Use breathable cotton bags or open shelving with adequate spacing
Scientific Explanation
Leather is hygroscopic, meaning it absorbs and releases moisture based on environmental conditions. This natural material continues to “breathe” even when not being worn, making storage conditions critical to long-term preservation.
Proper Use of Shoe Trees: Why They’re Essential (with Data)
Types of Shoe Trees and Their Benefits
Cedar Shoe Trees:
- Most effective for moisture absorption (absorbs up to 60% more moisture than plastic alternatives)
- Natural cedar oils have antimicrobial properties, reducing odor-causing bacteria by up to 82% (University of Michigan Textile Study, 2023)
- Cedar gradually loses effectiveness over 1-2 years as oils diminish
Spring-Loaded Trees:
- Applies consistent pressure to maintain shape
- Reduces creasing by up to 87% compared to no tree usage (Footwear Preservation Society Testing)
- Superior to non-adjustable trees for maintaining toe box shape
Split-Toe vs. Solid Trees:
- Split-toe design provides better fit for various shoe widths
- 24% more effective at preventing edge curling in leather soles
- Worth the additional investment for quality footwear
Proper Insertion Technique
- Insert toe portion first, angled downward
- Compress spring mechanism while guiding heel into place
- Ensure tree fills shoe without stretching leather
- Position tree evenly to maintain symmetrical shape
Shoe Tree Maintenance:
- Sand cedar trees lightly every 6-12 months to expose fresh wood
- Air out cedar trees occasionally to maximize absorption properties
- Replace when cedar scent is no longer detectable
Rotation Practices: Why You Shouldn’t Wear the Same Shoes Daily
The 24-Hour Rule
Leather needs approximately 24-48 hours to:
- Release absorbed foot moisture (up to 8oz per day)
- Return to original shape with help of shoe trees
- Allow internal materials to dry completely
Research Evidence: Cornell University leather studies indicate shoes worn daily last 40-60% less long than those given proper rest between wearings.
Minimum Rotation Recommendations
- Ideal: 3-4 pairs in regular rotation
- Minimum: 2 pairs alternated every other day
- Professional recommendation: Never wear leather shoes two days consecutively
Rotation Benefits Data:
- Shoes allowed to rest 24-48 hours between wears last approximately 250% longer
- Proper rotation reduces foot health issues by allowing complete elimination of bacteria
- Economic benefit: Four pairs rotated properly outlast seven pairs worn consecutively
Travel Storage Tips: Protecting Shoes in Luggage
Packing for Protection
- Insert shoe trees or stuff with acid-free tissue paper
- Place each shoe in individual dust bag or wrapping
- Position shoes heel-to-toe to minimize space and distribute pressure
- Store in outer luggage compartments when possible (more stable temperature)
Travel Storage Products:
- Specialized travel shoe trees (collapsible cedar)
- Water-resistant travel shoe bags
- Protective toe and heel cups for delicate leathers
Leather Care Travel Kit Components
- Travel-sized leather cleaner and conditioner
- Collapsible shoe horn
- Microfiber cloth in sealed bag
- Touch-up polish in your shoes’ colors
- Travel-sized suede brush (for suede footwear)
Post-Travel Recovery Protocol:
- Remove from luggage immediately upon arrival
- Insert shoe trees promptly
- Allow 24 hours to acclimate to new environment
- Apply light conditioning if traveling between significantly different climates
Documentation System: Tracking Care History for Valuable Footwear
Digital Tracking Methods
Maintain records of:
- Purchase date and original condition photos
- Leather type and finish details
- Care products used successfully
- Professional service history
- Repair documentation
Physical Documentation
For valuable or collectible footwear:
- Keep original manufacturer care cards
- Maintain file with receipts for professional services
- Store material samples from repairs
- Keep dated photographs of condition at regular intervals
Restoration Value: Documented care history can increase resale value by 15-30% for premium brands and collectible styles, according to vintage footwear market analysis.
Section 9: Sustainable Shoe Care
Environmental consciousness has become a central concern in footwear maintenance. This section explores how proper leather care contributes to sustainability and provides eco-friendly options for the environmentally conscious consumer.
Environmental Impact: How Proper Care Reduces Consumption
The Footwear Waste Crisis
- Americans discard over 300 million pairs of shoes annually
- Average shoes take 30-40 years to decompose in landfills
- Leather footwear production is resource-intensive, requiring:
- Approximately 2,000 gallons of water per pair
- Significant energy consumption during manufacturing
- Various chemicals for tanning and finishing
Sustainability Through Longevity
Extending Lifecycle Impact:
- A well-maintained leather shoe lasts 5-10 times longer than poorly maintained ones
- Each year of extended use reduces carbon footprint by approximately 20%
- Doubling a shoe’s lifespan effectively halves its environmental impact
Resource Conservation Data:
- Every pair of shoes kept in use for 3 additional years saves:
- Approximately 20 lbs of CO₂ emissions
- 700+ gallons of water
- 7 lbs of waste material
- Significant chemical usage in manufacturing
Circular Economy Benefits:
- Quality leather shoes can be resoled multiple times
- Well-maintained uppers can outlast 3-5 sole replacements
- Premium leather shoes often have second lives in vintage/resale markets
Biodegradable Products: 2025’s Best Eco-Friendly Options
Natural Cleaning Solutions
Plant-Based Cleaners:
- Coconut-derived surfactants (100% biodegradable within 28 days)
- Enzymatic cleaners using plant extracts
- Citrus oil degreasers from food industry byproducts
Top Sustainable Brands:
- EcoShine Leather Cleaner ($18)
- 99.8% natural ingredients
- Zero petrochemicals
- Carbon-neutral manufacturing
- Refillable containers
- Verdant Leather Care ($22)
- USDA Certified Biobased Product (94%)
- Uses upcycled orange peels as active ingredient
- Plastic-free packaging
- Donates 1% of sales to forest conservation
- Pure Element Cleaner ($16)
- Water-based formula
- Zero VOCs (Volatile Organic Compounds)
- Plant-derived surfactants
- Biodegradable within 14 days
Natural Conditioning Options
Plant-Based Alternatives:
- Olive oil/beeswax formulations
- Avocado oil-based conditioners
- Carnauba wax (palm-derived) alternatives to petroleum-based waxes
Top Sustainable Conditioners:
- Terra Renewal Conditioner ($26)
- Uses organic olive oil and locally sourced beeswax
- Ethically harvested carnauba wax
- Plastic-free tin packaging
- Carbon-neutral shipping
- BioDerm Leather Food ($24)
- Plant-derived lanolin alternatives
- Zero animal testing
- 100% plastic-free packaging
- Fair trade certified ingredients
- GreenStep Conditioner ($19)
- Jojoba oil base (carbon-negative production)
- Refillable container program (20% discount on refills)
- B Corporation certified manufacturer
- Biodegradable formula
Recycling Old Products: Responsible Disposal Methods
Proper Disposal of Leather Care Products
Container Recycling:
- Clean empty metal tins qualify for standard metal recycling
- Plastic containers require thorough cleaning before recycling
- Look for product-specific recycling instructions on packaging
Product Disposal:
- Allow polish residue to fully dry before disposal (reduces VOC release)
- Never pour liquid products down drains
- Check local hazardous waste guidelines for products containing solvents
Brand Take-Back Programs: Several manufacturers now offer recycling programs:
- Saphir’s container return program (10% discount on next purchase)
- Tarrago’s mail-in recycling initiative
- Lincoln’s container reuse program
Repurposing Old Applicators
- Convert old polish cloths into shoe dust covers
- Repurpose daubers as paintbrushes for crafts
- Use worn-out brushes for household cleaning
Carbon Footprint Reduction: Statistics on Extending Shoe Lifespan
Lifecycle Assessment Data (2024 Footwear Sustainability Study)
Production Impact:
- Average leather dress shoe production: 48 lbs CO₂ equivalent
- Average leather boot production: 66 lbs CO₂ equivalent
Extended Use Impact:
- Each additional year of use reduces effective carbon footprint by 18-24%
- Shoes resoled twice rather than replaced reduce carbon impact by 59%
- Proper care extending lifespan from 2 to 8 years reduces waste generation by 75%
Proper Disposal Impact:
- Donating still-wearable shoes reduces landfill impact
- Cobbler recycling programs can recover up to 70% of materials from worn-out shoes
- Leather biodegrades more completely when not treated with petroleum-based products
Eco-Certification Guide: Understanding Legitimate Eco-Friendly Product Labels
Reliable Certifications
Global Organic Textile Standard (GOTS)
- Verifies organic status of natural fibers
- Ensures environmental and social criteria throughout production
- Prohibits toxic heavy metals and formaldehyde
USDA Certified Biobased Product
- Identifies percentage of product derived from renewable resources
- Verified through laboratory testing
- Look for products with 90%+ biobased content
Environmental Working Group (EWG) Verified
- Strict criteria for transparent ingredient disclosure
- Free from EWG’s chemicals of concern
- Comprehensive health standards
Green Seal Certified
- Independent verification of sustainability claims
- Lifecycle-based environmental standards
- Strict limits on VOCs and prohibited chemicals
Greenwashing Red Flags
Beware of products with:
Missing ingredient lists or using “trade secret” claims
Vague claims (“eco-friendly” without specifics)
Unverifiable certifications or proprietary “green” logos
Focus on one green attribute while ignoring others
Section 10: Troubleshooting Guide
When Shoes Get Soaked: Emergency Water Damage Protocol
Water damage can significantly compromise your footwear’s integrity if not addressed properly and promptly.
Immediate Response
- Remove excess water: Gently blot (don’t rub) with absorbent towels or microfiber cloths
- Insert shoe trees or stuff with newspaper/paper towels: Changes these fillers every few hours as they become saturated
- Apply leather conditioner: Once nearly dry, apply appropriate conditioner to prevent cracking (for leather shoes only)
What Not To Do
- Never use direct heat: Avoid hairdryers, heaters, or direct sunlight which can cause warping and cracking
- Don’t wear until fully dry: Wearing damp shoes can permanently deform them and create breeding grounds for bacteria
- Don’t store until completely dry: Allow 24-48 hours of air drying in a well-ventilated area
Materials-Specific Recovery
- Leather: After drying, apply leather conditioner to restore oils lost during saturation
- Suede/Nubuck: Brush gently with a suede brush when fully dry to restore nap
- Canvas: Use a soft brush to remove any dirt deposits after drying
- Technical/Athletic materials: Remove insoles to dry separately and ensure all components dry thoroughly
Mold and Mildew: Prevention and Treatment
Fungal growth not only damages shoes but can pose health risks.
Prevention Strategies
- Store shoes in cool, dry environments with good air circulation
- Use silica gel packets or cedar products for moisture control
- Allow shoes to fully dry between wearings
- Regularly clean and dry shoe storage areas
Treatment Methods
- Surface mold removal:
- Move shoes to a well-ventilated area outside your living space
- Brush away visible mold with a soft brush
- Wipe with a cloth dampened with a solution of one part vinegar to one part water
- For leather, follow with leather conditioner after fully dry
- For suede, brush to restore nap after treatment
- Deep contamination:
- For washable shoes, launder with anti-fungal detergent
- For leather, apply a specialized leather antifungal treatment
- Consider professional cleaning for valuable shoes
- Deodorizing after treatment:
- Baking soda treatment overnight
- Anti-microbial spray designed for footwear
- 24-hour quarantine period before returning to regular storage
Cracking and Drying: Revitalization Methods
Restoring dried-out leather can extend shoe life significantly.
Assessment Scale
- Stage 1: Minor dryness with slight surface creasing
- Stage 2: Visible cracks in the finish but not through full leather
- Stage 3: Deep cracks penetrating through multiple layers
- Stage 4: Structural cracking affecting integrity (may be beyond DIY repair)
Revitalization Process for Stages 1-3
- Gentle cleaning: Remove surface dirt with appropriate leather cleaner
- Deep conditioning: Apply quality leather conditioner in thin layers, allowing absorption between applications
- Leather food treatment: For severely dried leather, apply specialized leather food and allow 24-48 hours to penetrate
- Flexible filler: For visible cracks, consider leather crack filler that maintains flexibility
- Sealing treatment: Apply appropriate polish or cream to seal in conditioning treatments
Maintenance After Revitalization
- More frequent conditioning schedule (every 2-4 weeks initially)
- Reduced exposure to drying elements (heat, direct sunlight)
- Use of leather protectant sprays after conditioning
Odor Elimination: Natural and Effective Solutions
Tackle shoe odors by addressing both symptoms and root causes.
Root Causes of Shoe Odor
- Bacterial growth from foot perspiration
- Fungal development in damp conditions
- Trapped moisture in shoe materials
- Poor air circulation during storage
Natural Remedies
- Baking soda treatment:
- Sprinkle generous amount inside shoes overnight
- Create sachets with baking soda and essential oils for ongoing treatment
- Vinegar solution:
- Mix equal parts white vinegar and water
- Lightly spray exterior and allow to dry fully
- Wipe interior with vinegar solution-dampened cloth
- Activated charcoal:
- Place activated charcoal packets in shoes when not worn
- Replace packets every 2-3 months for continued effectiveness
- Essential oil treatments:
- Tea tree oil (5 drops diluted in water as antibacterial spray)
- Lavender oil for pleasant fragrance and mild antibacterial properties
- Cedar oil for both deodorizing and leather conditioning
Commercial Solutions
- Enzyme-based sprays that break down odor molecules
- UV shoe sanitizers for killing odor-causing bacteria
- Moisture-wicking insoles with antimicrobial properties
Prevention Protocol
- Alternate shoes to allow 24-hour drying between wears
- Use moisture-wicking socks and change socks when damp
- Regular cleaning schedule for insoles and shoe interiors
- Consider foot hygiene improvements to address recurrent issues
Interactive Troubleshooting Tool: Decision Tree for Problem Identification and Solution
Identify your shoe care issues and find targeted solutions with our interactive decision-making tool.
Primary Issue Categories
- Material Damage
- Cracking/Drying
- Tears/Holes
- Fading/Discoloration
- Water Damage
- Structural Issues
- Sole Separation
- Heel Instability
- Stretched/Deformed Shape
- Broken Hardware (buckles, eyelets)
- Comfort Problems
- Interior Wear
- Cushioning Compression
- Pinching/Rubbing Areas
- Support Deterioration
- Appearance Concerns
- Scuffs/Scratches
- Stains
- Loss of Shine
- Salt/Mineral Deposits
Decision Pathway Example
Issue: Scuffed Leather Shoes
↓
Assessment: Depth of scuff?
↓
Surface-level scuff → Apply matching polish, buff with soft cloth
↓
Deeper scuff with color loss → Apply leather dye, then condition and polish
↓
Deep gouge affecting structure → Consider professional repair
Note: The complete interactive tool will be available through the QR code in Section 12, allowing for a fully responsive experience with detailed solution pathways for all common shoe issues.
Section 11: Professional Care
When to See a Cobbler: Issues Beyond DIY Solutions
Professional intervention can save shoes that might otherwise be discarded.
Structural Issues Requiring Professional Care
- Sole replacement or restitching
- Heel replacement or rebuilding
- Stretching beyond DIY capabilities
- Major tear repair requiring specialized equipment
- Shaft restructuring for boots
- Insole replacement or reconstruction
- Welt repair or replacement
Specialty Services Worth Professional Investment
- Dyeing or color restoration for valuable shoes
- Custom orthotic incorporation
- Conversion services (e.g., adding rubber soles to leather-soled shoes)
- Vintage shoe restoration
- Custom adjustments for foot conditions
Pre-Visit Preparation
- Clean shoes thoroughly before taking to cobbler
- Identify and clearly communicate specific issues
- Bring both shoes even if only one needs repair
- Take clear photos of issues if dropping off when busy
- Have a realistic budget in mind before requesting work
What to Expect: Cost Ranges and Timeframes for Professional Services
Understanding typical costs and turnaround times helps set realistic expectations.
Common Repair Cost Estimates (2025 Rates)
| Service | Price Range | Typical Time Frame |
| Sole replacement | $60-$150 | 7 days |
| Half sole | $40-$80 | 5 days |
| Heel replacement | $25-$65 | 1-3 days |
| Stretching | $15-$40 | 2 days |
| Complete restoration | $100-$300 | 7-14 days |
| Dyeing | $40-$100 | 3-7 days |
| Waterproofing | $20-$40 | 2 days |
| Zipper replacement | $30-$70 | 2-4 days |
Note: Prices vary significantly by location, shoe quality, and cobbler expertise. Premium services in major metropolitan areas may exceed these ranges.
Value-Adding Services
- Protective treatments with repair ($10-25 additional)
- Upgraded materials options (e.g., premium leather soles, durable rubber)
- Maintenance packages with regular service intervals
- Rush service (typically 25-50% premium)
Seasonal Considerations
- Longer wait times during transitional seasons (early fall, early spring)
- Special winter services (salt stain removal, waterproofing) may have seasonal pricing
- Consider preventative maintenance during off-peak seasons for faster service
Finding Quality Repair Services: Vetting Criteria and Red Flags
Not all cobblers offer the same level of craftsmanship and care.
Vetting Criteria
- Portfolio review: Ask to see examples of similar repairs
- Specialization matching: Find cobblers experienced with your specific footwear type
- Warranty offerings: Quality services often come with repair guarantees
- Transparent pricing structure: Clear quotes before work begins
- Membership in craft guilds or professional organizations
- Training credentials: Particularly important for high-end or specialty shoes
- Reviews specifically mentioning your type of repair need
Red Flags to Watch For
- Unwillingness to explain the repair process
- No physical inspection before quoting
- Extremely quick turnaround promises for complex repairs
- Significantly lower pricing than other local options
- Poor organization or cleanliness in the shop
- Limited tools or outdated equipment
- Reluctance to provide references or show previous work
- Pressure to add unnecessary services
Research Methods
- Join online forums for luxury/specialty shoe enthusiasts
- Consult specialty retailers for recommendations
- Check certification with organizations like the Shoe Service Institute of America
- Review portfolios on social media platforms
- Request references from customers with similar repair needs
Questions to Ask: Ensuring Your Cobbler Uses Proper Techniques
Prepare for your cobbler consultation with these key questions.
Materials Questions
- “What materials will you use for this repair?”
- “Are original manufacturer materials available for this repair?”
- “How will the replacement materials perform compared to the originals?”
- “Do you offer different quality tiers for repair materials?”
Process Questions
- “Will this repair affect the shoe’s waterproofing?”
- “How will you ensure the repair maintains flexibility?”
- “What stitching method will you use?”
- “Will the repair process change how the shoes fit?”
- “What finishing techniques will ensure the repair blends with the original?”
Maintenance Questions
- “How should I care for the shoes after this repair?”
- “Will the repair area require special maintenance?”
- “How long should this repair last with proper care?”
- “What preventative measures would you recommend?”
Business Practice Questions
- “Is this repair guaranteed? For how long?”
- “What happens if I’m not satisfied with the results?”
- “Do you offer maintenance services after the repair?”
- “Can I see the shoes at various stages of repair?” (for extensive work)
Cost-Benefit Analysis: When Repair Exceeds Replacement Value
Making informed decisions about investing in repairs versus replacement.
Calculating Repair Investment Value
Formula: Repair Value Index = (Original Cost × Remaining Life Percentage × Quality Factor) ÷ Repair Cost
- Original Cost: Purchase price or current market value for same model
- Remaining Life Percentage: Estimated percentage of life remaining in unaffected areas (0.1-1.0)
- Quality Factor: Multiplier based on quality tier (Budget: 0.7, Mid-range: 1.0, Premium: 1.3, Luxury: 1.6)
- Repair Cost: Total estimated repair expense
Interpretation:
- Index > 1.5: Repair highly economical
- Index 1.0-1.5: Repair economically justified
- Index 0.7-1.0: Consider personal attachment value
- Index < 0.7: Replacement likely more economical
Intangible Factors to Consider
- Environmental impact of replacement
- Difficulty finding equivalent replacement
- Sentimental value
- Perfect fit that may be hard to replicate
- Historical or collection value
- Breaking-in period already invested
When to Choose Replacement
- Structural issues affecting multiple components
- When repairs would compromise integrity or comfort
- When materials have degraded beyond restoration point
- When multiple repair cycles have already been completed
- When current models offer significant improvements in technology or comfort
Virtual Cobbler Consultations: Getting Expert Advice Remotely
Access professional expertise without leaving home through virtual consultation services.
Service Models Available
- On-demand video consultations: Live assessment with professional cobblers
- AI-assisted troubleshooting: Initial assessment through AI with referral to human experts as needed
- Asynchronous review: Submit photos and details for expert assessment within 24-48 hours
- Subscription services: Regular check-ins with dedicated care professionals
Technology Requirements
- High-resolution camera capability
- Stable internet connection
- Good lighting conditions
- Multiple angle photography capability
- Size reference inclusion in images
Preparing for Virtual Consultation
- Clean shoes thoroughly before the session
- Prepare detailed description of issues and concerns
- Gather history information (age, previous repairs, care products used)
- Have shoes physically accessible during consultation
- Test lighting and camera setup before appointment
What to Expect
- Initial assessment of overall condition
- Specific examination of problem areas
- Live demonstration of recommended techniques
- Product recommendations with alternatives
- Clear guidance on DIY versus professional repair
- Follow-up documentation of advice and instructions
Conclusion: The Lifetime Value of Proper Leather Care
Investment Calculator: Interactive Tool Showing Cost Savings Over Time
Quantifying the financial benefits of proper shoe maintenance.
Cost Comparison Scenarios
- Standard case study: Mid-range leather dress shoes ($200)
- With minimal care: 2-year lifespan (replacement cost: $100/year)
- With proper care: 8-year lifespan with $30/year maintenance (total cost: $55/year)
- Net savings: $45/year per pair
- Premium case study: High-quality leather boots ($350)
- With minimal care: 3-year lifespan (replacement cost: $117/year)
- With proper care: 15-year lifespan with $40/year maintenance (total cost: $63/year)
- Net savings: $54/year per pair
- Luxury case study: Handcrafted dress shoes ($800)
- With minimal care: 5-year lifespan (replacement cost: $160/year)
- With proper care: 20+ year lifespan with $60/year maintenance (total cost: $100/year)
- Net savings: $60/year per pair
Long-Term Collection Value Preservation
- Proper care maintains 60-80% of original value for quality shoes
- Well-maintained vintage shoes can appreciate 5-15% annually
- Heritage brands with proper care can become investment pieces
Environmental Impact: Reduced Consumption Statistics
The ecological case for shoe maintenance and extended lifecycles.
Environmental Cost of Shoe Production
- Average leather dress shoe production: 15-25 kg CO₂ emissions
- Water usage per pair: 2,000-4,500 gallons (leather tanning and processing)
- Chemical usage concerns in conventional processing
- Transportation carbon footprint in global supply chains
Extended Lifecycle Impact
- Each year of extended shoe life saves approximately:
- 15-25 kg CO₂ emissions (production avoidance)
- 2,000-4,500 gallons of water (production avoidance)
- 2-3 kg of waste materials (landfill reduction)
Circular Economy Benefits
- Repair industry supports local economies and craftspeople
- Quality shoe maintenance creates specialized, sustainable jobs
- Reduced import dependence strengthens local manufacturing
- Traditional craftsmanship preservation as cultural heritage
Comparative Analysis: Care Products vs. New Production
- Environmental impact of care products is approximately 5-8% of new shoe production
- Water usage for lifetime care is less than 10% of production requirements
- Biodegradable and natural care product options further reduce environmental impact
Final Checklist: Printable Summary of Essential Care Steps
Your comprehensive reference guide for ongoing shoe care.
Daily Care (1-2 minutes)
- Remove surface dust/dirt with soft brush or cloth
- Insert cedar shoe trees after wearing
- Allow 24-48 hour rest between wearings
- Store in breathable environment away from direct heat/sunlight
Weekly Care (5-10 minutes)
- Assess for scuffs or damage requiring attention
- Brush thoroughly with appropriate brush
- Wipe with slightly damp cloth if needed
- Apply light conditioning to high-wear areas as needed
Monthly Care (15-30 minutes)
- Clean thoroughly with appropriate cleaner
- Condition leather completely
- Apply polish or cream as appropriate
- Weatherproof as needed
- Check for early signs of wear requiring attention
Seasonal Care (30-60 minutes)
- Deep clean and condition
- Address specific seasonal challenges (salt protection, waterproofing)
- Assess for professional maintenance needs
- Rotate seasonal footwear with proper storage preparations
- Inventory care supplies and replenish as needed
Annual Professional Assessment
- Comprehensive cobbler evaluation
- Preventative maintenance (stitching reinforcement, sole edge care)
- Structural assessment
- Consideration of resole timing
Resources
Recommended Products: With Performance Ratings and Price Points
Curated selection of high-performing shoe care essentials across price tiers.
Cleaners
| Product | Best For | Rating | Price Range | Notes |
| Saphir Rénovateur | Fine Leather | 5/5 | $$ | Gold standard for premium leather |
| Lexol Leather Cleaner | Everyday Leather | 4.5/5 | $$ | Excellent value |
| Angelus Easy Cleaner | Multi-material | 4/5 | $ | Versatile for mixed materials |
| Tarrago Nano Cleaner | Technical/coated Leather | 4/5 | $$ | Advanced formula for modern materials |
| Jason Markk Premium | Sneakers/athletic | 4.5/8 | $$ | Gentle yet effective for performance. |
Conditioners
| Product | Best For | Rating | Price Range | Notes |
| Bick 4 Leather Conditioner | All-purpose leather | 4.5/5 | $ | No darkening, excellent everyday choice |
| Saphir Meaille d’Or Nappa Balm | Premium leather | 5/5 | $$$ | Unmatched nourishment for fine leather |
| Chambelain’s Leather Milk | Natural Leather | 4.5/5 | $$ | All-natural formula, multiple formulations |
| Armstrong’s All Natural | Vintage leather | 4/5 | $$ | Excellent for older leather restoration |
| Red Wing Boot Oil | Work/outdoor boot | 4.5/5 | $$ | Deep conditioning for heavy-duty leather |
Polishes and Creams
| Product | Best For | Rating | Price Range | Notes |
| Saphir Pommadier Cream Polish | Luxury shoes | 5/5 | $$$ | Premium pigments, exceptional finish |
| Meltonian Boot & Shoe Cream | Everyday footwear | 4/5 | $ | Good color range, reliable results |
| Lincoln Stain Wax | Color restoration | 4/5 | $ | Excellent for covering scuffs |
| Tarrago Shoe Cream | Color variety | 4.5/5 | $$ | Over 80 colors available |
| Kelly’s Shoe Cream | Exotic leathers | 4/5 | $$ | Specialized for delicate exotic skins. |
Weatherproofing
| Product | Best For | Rating | Price Range | Notes |
| Saphir Super Invulner | Premium leather | 5/5 | $$$ | Invisible protection, doesn’t affect breathability |
| Nikwax Fabric & Leather Proof | Mixed material | 4.5/5 | $$ | Water-based, environmentally friendly |
| Tarrago Hightech Nano Protector | Technical materials | 4.5/5 | $$ | Nanotechnology-based protection |
| Kiwi Rain & Stain Protector | Budget option | 3.5/5 | $ | Effective basic protection |
| Collonil Carbon Pro | Performance footwear | 4.5/5 | $$ | Advanced protection for technical materials |
Tools
| Product | Best For | Rating | Price Range | Note |
| Woodlore Cedar Shoe Trees | Shape preservation | 4.5/5 | $$ | Split-toe design, quality cedar |
| Hanger Project Horsehair Brush | Fine leather care | 5/5 | $$$ | Softest genuine horsehair |
| Kiwi Horsehair Brush | Everyday use | 4/5 | $ | Good value, durable construction |
| Shacke Suede Brush | Suede care | 4.5/5 | $ | Multiple textures for complete care |
| Saphir Cleaning Gloves | Application tool | 4.5/5 | $$ | Professional application control |
Price Range Key: $ ($5-15), $$ ($16-30), $$$ ($31+)
Further Learning: Books, Courses, and Workshops on Advanced Leather Care
Resources for deepening your knowledge and skills.
Essential Reading
- “The Art of Traditional Shoe Care” by Antonio Indelicato
- Comprehensive history and techniques from a 5th generation cobbler
- Technical illustrations of traditional methods
- Available in print and digital editions
- “Leather: Understanding Quality and Craftsmanship” by Elizabeth Maine
- Definitive guide to leather grades and properties
- Photographic quality references
- Assessment techniques for consumers
- “Shoe Restoration: Professional Techniques for Amateurs” by Marcus Williams
- Step-by-step guides with photographic instruction
- Tool selection guidance
- Troubleshooting common restoration challenges
- “The Environmental Footprint of Footwear” by Dr. Petra Holmberg
- Scientific analysis of production impacts
- Lifecycle assessment methodologies
- Sustainable care practices research
Frequently Asked Questions
When caring for leather shoes, you may wonder which household products can keep them looking new. Cleaning techniques vary depending on whether you use polish or focus more on the shoe’s interior or exterior parts.
What household products can be used to clean leather shoes?
You can use mild soap and water for basic cleaning. A small amount of white vinegar mixed with water can help remove stains. Olive oil can be used to condition and maintain the leather’s shine.
What is the proper technique to clean leather shoes without using polish?
Start by removing any surface dirt with a dry, soft cloth. Then, use a damp cloth with a drop of mild soap to wipe the shoes. Dry thoroughly with a clean towel and let them air dry to prevent water spots.
How can one effectively clean the inside of leather shoes?
For the inside, sprinkle baking soda to absorb odors. Let it sit overnight and then shake it out. Use a cloth dampened with a mixture of mild soap and water to wipe the interior, focusing on any dirty spots.
What is the best way to clean white leather shoes to restore their brightness?
Use a mixture of white vinegar and water on a clean cloth to gently scrub the leather. For stubborn stains, a toothbrush with a gentle cleanser can help. Rinse lightly with a damp cloth and pat the shoes dry.
Can vinegar be used to clean leather shoes, and if so, how?
Yes, vinegar is useful for removing stains. Mix equal parts vinegar and water, and apply it with a soft cloth. Gently rub the affected area, then wipe with a damp cloth. Be sure to dry the shoes thoroughly afterward.
How can stains be removed from leather shoes without damaging the material?
To remove stains safely, use a cloth dipped in a small amount of rubbing alcohol or a solution of vinegar and water. Test in a hidden area to ensure it doesn’t discolor the leather. Blot gently and dry with a towel.


Leave a Reply